mercoledì 31 maggio 2017

GOING AROUND IN CIRCLES...


Ciao a tutti e bentornati sulle pagine di questo Blog! Come avrete già capito è il momento della Sfida sul Blog di SIMON SAYS STAMP...e anche questa settimana è di scena il mio Art Journal!!!

Hello everyone and welcome back! As you might have guessed it's time for a new Challenge over at SIMON SAYS STAMP...and, as usual, it's another Art Journal Spread!!!

Tra poco sarà il nostro Anniversario di Matrimonio...17 anni volati in un attimo...quindi ho deciso di decorare queste pagine utilizzando una foto che ho fatto recentemente e che mi piace molto. Poichè il tema della sfida del Lunedì è 'WE'RE GOING AROUND IN CIRCLES' ho appunto aggiunto vari cerchi, utilizzando stencil, timbrate e fustelle...inoltre è stata l'occasione perfetta per continuare la mia sperimentazione con i Distress Oxides!

In few days will be our Wedding Anniversary...17 years flown away in a heartbeat...so I have decided to make a Journal spread using a photo that I love. Since the new Monday challenge theme is 'WE'RE GOING AROUND IN CIRCLES' I added different kind of circles using stencils, stamps and die cuts...plus has been the perfect occasion to continue my experiments with Distress Oxides!


Per prima cosa ho coperto le pagine con il Gesso Bianco, poi ho provato ad utilizzare la tecnica 'Resist' di KATH, usando il Distress Crayon Picket Fence attraverso uno stencil...perfetta!
Poi ho utilizzato i Distress Oxide Vintage Photo e Cracked Pistachio con lo stencil 'Specimens' di TCW.
Ho incollato dei ritagli di carta e del pizzo per creare della texture, poi sempre con lo stencil di prima ho aggiunto anche della Modeling Paste.
Ho diluito in acqua i Magicals della Lindy's Stamp Gang Tibetan Poppy Teal e Drop Dead Gorgeous Green ed ho iniziato a spruzzarli sulle pagine, Poi con il Distress Blending Tool ho steso prima il Distress Ink Antique Linen e poi il Vintage Photo...e poi via con lo SPRITZ & FLICK!!!
Ho voluto provare anche a timbrare con i Distress Oxides e sono perfetti anche per quello!
Per le timbrate ho usato D.O. Broken China e Vintage Photo.
Ho fatto cadere qualche goccia di Magicals qua e la e ripulito le zone dove avevo steso il Distress Crayon con una salviettina. Ho aggiunto delle fustellate per creare i cerchi (anche se irregolari, ma danno sicuramente più movimento alla pagina) la scritta 'Together' l'ho tagliata usando le Thinlits 'Handwritten Love' di Tim Holtz ed il cuore con il Mini Love Struck Set Movers&Shapers sempre di Tim. Entrambi li ho dipinti con i D.O. Cracked Pistachio e Broken China. Poi ho aggiunto qualche tocco di Distress Ink Ground Espresso.
Ho infine aggiunto alcuni chipboard che ho poi dipinto con  Opal Magic Acrylic Paint Aqua-Rose di Finnabair/Prima.

First thing I gessoed the pages, then used the 'Distress Crayon Resist Technique' explained by KATH in her blog...just perfect!
Used Distress Oxides Vintage Photo and Cracked Pistachio with the 'Specimens' stencil by TCW.
Glued some paper scraps and lace to create some texture and using again the Specimens stencil, added some Modeling Paste.
Diluted Lindy's Stamp Gang Magicals Tibetan Poppy Teal and Drop Dead Gorgeous Green in a bottle with water and started spraying on the pages, then with the Distress Blending Tool added first Antique Linen Distress Ink, then Vintage Photo...and...on with the SPRITZ & FLICK!!!
I wanted to try to stamp with Distress Oxides and I have to say that they are perfect even for this!
I have used D.O. Vintage Photo and Broken China.
Flicked few drops of Magicals here and there and clean with a baby wipe where I have used the 'Resist' Technique. Added few die cuts as circles (Though very 'unconventional', they definitely add something to the spread), the word 'Together' is cut using Tim Holtz Thinlits 'Handwritten Love', while the Heart is from Tim's Mini Love Struck Set of Movers&Shapers. Both have been painted using D.O. Cracked Pistachio and Broken China, then added a touch of Ground Espresso Distress Ink.
As final touches added few 'bubbly' chipboards which I painted using Finnabair/Prima Opal Magic Acrylic Paint Aqua-Rose.


E con questo è tutto...Presento questo progetto per le seguenti sfide...

So this is it...I submit this project to the following challenges...

- SIMON SAYS STAMP MONDAY CHALLENGE: WE'RE GOING AROUND IN CIRCLES

- SIMON SAYS STAMP WEDNESDAY CHALLENGE: ANYTHING GOES

Alla prossima...

See you next time...

Kisses&Hugs!
Simo.
venerdì 26 maggio 2017

Art & Art: SIMONA: Romantic Steampunk!


Art &Art: SIMONA: Romantic Steampunk!: Ciao a tutti! Eccomi oggi con un nuovo tutorial...

Cliccate sul link per andare al mio tutorial sul blog di Art&Art...

Hi everyone...this is my new tutorial for Art&Art DT...if you follow the link it will take you to the tutorial...as usual it's in Italian but with lots of pictures...Enjoy!

Kisses&Hugs!
Simo.

giovedì 25 maggio 2017

I love EWE...


Ciao a tutti e bentornati! Indovinate cosa vi faccio vedere oggi? Bravi...ancora una pagina di Art Journal...cosa volete farci...tra le tante ho anche questa ossessione...!
Comunque la sfida del Lunedì sul Blog di SIMON SAYS STAMP è stata la perfetta occasione per provare i meravigliosi DISTRESS OXIDES!!! Che dire...è nato un nuovo amore...

Hello everyone and welcome back! Guess what I am showing you today? Excellent guess...another page from my Art Journal...what can I say? Among the others I have also this obsession...!
Anyways...the new Monday Challenge over at SIMON SAYS STAMP has been the perfect chance to try my wonderful DISTRESS OXIDES!!! Again...a new love is born...


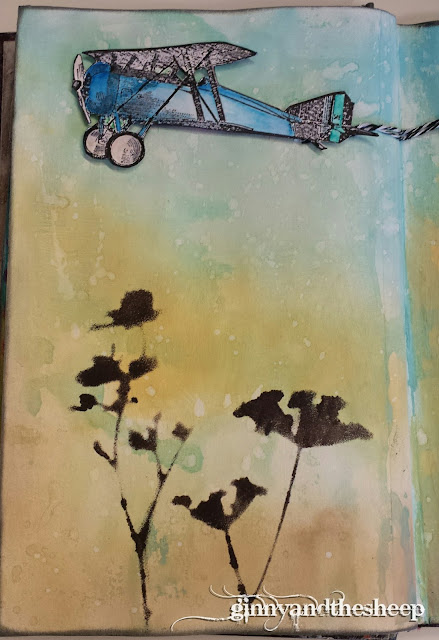
Ho steso i Distress Oxides con il Distress Blending Tool direttamente sulle pagine...dall'alto ho steso Broken China e Cracked Pistachio, ho asciugato e poi ho usato la mia tecnica preferita...'SPRITZ & FLICK'...l'effetto è fantastico, specie al tatto...come già detto da tanti, hanno questa finitura 'Chalky' (cioè tipo gesso) davvero molto interessante!
Ho poi continuato con Spiced Marmalade, Peeled Paint ed in ultimo Vintage Photo.
Ho usato il negativo che mi era rimasto dopo aver fustellato le 'Wildflowers' Thinlits di Tim Holtz come uno stencil, utilizzando una spugnetta ed  acrilico nero.
Poichè il tema della sfida è 'LITTLE CRITTERS' ho disegnato usa pecorella dallo stile Country, su un foglio per acquerello è l'ho dipinta con i colori acrilici. Ho incollato dei bottoncini al 'Penny Rug' ed anche il mio critter è  completato.
Ho stampato l'aereo sempre su cartoncino per acquerello e l'ho colorato usando i Markers, infine ho preparato il banner con la scritta...

I have blended Distress Oxides on the pages using the Distress Blending Tool...starting from the top I have used Broken China and Cracked Pistachio, dried and used my favourite technique...'SPRITZ & FLICK'...the effect is great, expecially when you touch it...as already said by others, the Oxides have this 'Chalky' finish that is very interesting!
I went on with Spiced Marmalade, Peeled Paint and Vintage Photo.
I have used the negative from Tim Holtz 'Wildflowers' die cuts, as a stencil with a sponge and some black acrylic paint.
As the challenge theme is 'LITTLE CRITTERS' I have drawn a little Country Sheep on watercolor cartstock and painted with acrylic paints. I also glued down some tiny buttons on the 'Penny Rug' as final touches, and my critter is completed.
I stamped the plane on watercolor cardstock and painted using Markers and to finish it off I wrote the sentiment and cut it as a banner...

Ecco finito la mia pagina...
And my page is done...

Presento questo progetto per .../ I submit this project to...

- SIMON SAYS STAMP MONDAY CHALLENGE BLOG: LITTLE CRITTERS

- SIMON SAYS STAMP WEDNESDAY CHALLENGE BLOG: FURRY FRIENDS


Ci vediamo alla prossima!

See you next time!

Kisses&Hugs!

Simo.

sabato 20 maggio 2017

A Mother's love...


Ciao a tutti! Ecco un'altra pagina del mio art journal...anche se in ritardo per la sua festa...
Adoro questa foto di mia madre..anche se sono passati quasi vent'anni da quando l'abbiamo salutata, il suo amore per noi ci è rimasto addosso, come una calda coperta...l'Amore di una Madre non ti lascia mai...
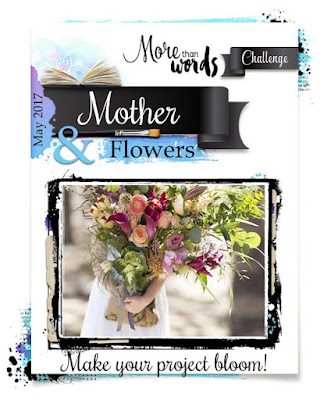
Ho quindi deciso di partecipare alla challenge del mese di Maggio di More Than Words...Bisognava abbinare la parola 'MOTHER' con i fiori...ed ecco come è nato questo spread...

Hello everyone! Here it is another page from my art journal...though I'm late for Her day...
I love love love this picture of my Mom! Even if  it's almost twenty years  since the day we bid her farewell, her love stayed on us...like a warm blanket...A Mother's Love never leave us...
So I have decided to play with  More Than Words May Challenge...the task was to make something with the word 'MOTHER' and combine it with flowers...so here's how this spread came to be...


Ho iniziato con gesso bianco, poi ho steso della modeling paste con una spatola, per dare texture. Dopo è iniziato il divertimento.. spruzzare gli spray della Lindy's Stamp Gang: Moonshadow Phantom Fuchsia, poi Starburst Gregarious Grey ed infine Moonshadow Crow's Nest Copper, spruzzando anche acqua per diluire i vari colori. Ho incollato del pizzo e poi ho aggiunto un po' di colore nella parte inferiore delle pagine con il Magicals Hottie Patottie Hot Pink, steso con un pennello a serbatoio e spruzzato con acqua. Ho schizzato un po' di inchiostro bianco ed ho iniziato ad assemblare il tutto.
I particolari dorati sono colorati con l'acrilico Splendid Gold della serie Dazzling Metallics della DecoArt, foglie e silhouette dei fiori sono ricavate dalle fustelle di Tim Holtz 'Garden Greens' e 'Wildflowers'. Le rose, della Prima, le ho spruzzate con il Phantom Fuchsia ed il Crow's Nest Copper.
Ho aggiunto qualche perla e le scritte: per le parole ho usato le thinlits di T. Holtz 'Handwritten Love' e per formare la parola 'Mother' ho usato le Thinlits 'Alphanumeric'.
Ho ripassato tutti i bordi con pennello asciutto ed il gesso bianco per dare un'aria un po' eterea e per finire ho incollato un cordino rosa sul mazzolino di fiori selvatici...del resto da piccola erano proprio i fiori di campo che raccoglievo per lei...non l'abbiamo fatto tutti?

I started with white gesso, then added modeling paste with a spatula for more texture. After that started the fun...using Lindy's Stamp Gang sprays: Moonshadow Phantom Fuchsia,  Starburst Gregarious Grey and  Moonshadow Crow's Nest Copper, adding water here and there. Glued some lace then added Hottie Patottie Hot Pink Magicals with a water-brush and sprayed with water. Spattered with with ink and started adding the embellishments.
All the 'gilded' details have been painted with DecoArt Dazzling Metallics 'Splendid Gold', leaves and flowers silhouettes are die-cuts from Tim Holtz dies 'Garden Greens' and 'Wildflowers'. Roses are from Prima, sprayed with Phantom Fuchsia ed il Crow's Nest Copper. Added few pearls and words: I have used T.Holtz 'Handwritten Love' and 'Alphaumeric' Thinlits. 
Drybrushed the edges with white gesso to give a sort of ethereal look and added a pink bow made of string on the wildflowers bouquet...after all those were the first flowers I gathered for her...haven't we all?


Presento questa pagina per la seguente sfida/I submit this page to the following challenge:

 More Than Words Challenge
MORE THAN WORDS: MAY 2017 MAIN CHALLENGE - MOTHER & FLOWERS

Ci vediamo alla prossima!

See you next time!

Kisses&Hugs!
Simo.

mercoledì 17 maggio 2017

What makes a Home...


Ciao a tutti e bentornati...oggi  ho iniziato un nuovo art journal e ho deciso di utilizzare un vecchio libro che avevo da tempo.
Ecco quindi il mio progetto odierno, basato sul tema della Sfida del LUNEDI di SIMON SAYS STAMP: Home Sweet Home...
Cosa rende speciale il posto che noi chiamiamo CASA? Per me sono l'Amore, la Fiducia, la Complicità...tutto ciò è racchiuso dalla frase che ho scelto: RIDI SPESSO, VIVI BENE, AMA TANTO...

Hello everyone and welcome back...today I have started a new art journal and  I decided to use an old book that has been in my stash for ages.
So here's my project, based on the new theme for SIMON SAYS STAMP MONDAY CHALLENGE: Home Sweet Home...
What makes a HOME? To me it's Love, Trust, Understanding...everything is summed up in these words: LAUGH OFTEN, LIVE WELL, LOVE MUCH...


Ho cercato di stare sul semplice, pochi colori, un paio di stencil, qualche timbrata e del washi tape...e finalmente ho trovato un uso per le stampe che avevo fatto tempo fa con la Gelli Plate!

I tried to keep it simple, few colors, a couple of stencils, few stamps here and there and some washi tape...and I finally got to use some prints made while ago with my Gelli Plate!

Alla prossima!

See you next time!

Kisses&Hugs!
Simo.

venerdì 12 maggio 2017

My Steampunk Art Journal...


Ciao a tutti! Finalmente ho finito il mio Art Journal...nel senso che ho proprio finito le pagine da decorare, quindi non mi restava che decorare la copertina!
Vuoi non metterci lo Steampunk di mezzo? Ha! come no...ecco a voi il mio bellissimo - almeno per me - Art Journal!
Preparatevi per millemila foto, da ogni angolazione,  della copertina...forse si capisce che ne sono orgogliosa!!! Lol!

Hello everyone! Finally I have finished my Art Journal... I mean I completed the inside pages...so I really had to come up with something for the cover!
Do you really think that I wouldn't go Steampunk? Ha! Who... me? So here's to you my beautiful - at least for me - Art Journal!
Please be aware of the bazillion of pictures, quite from every angle, of the cover..it's definitely safe to say  that I am very  proud of it!!! Lol!


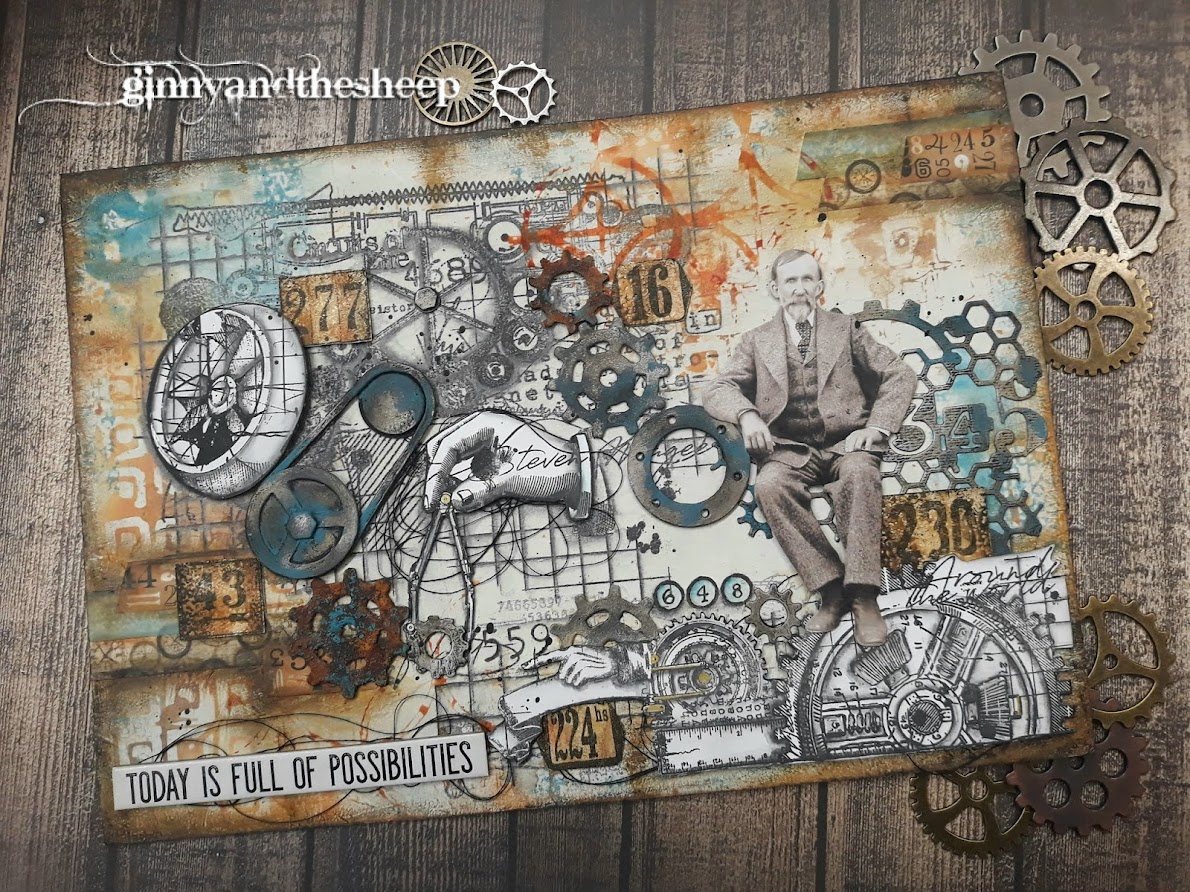
Ho adattato la 'Rust Technique' di Andy Skinner ai prodotti DECOART che ho in casa e l'ho applicata agli ingranaggi fustellati con la fustella di Tim Holtz GADGET GEARS #2, sugli angoli ed intorno al cuore.  Ho cercato di dare alla copertina l'effetto pelle consumata, mentre per 'le placche di metallo' ho seguito alla lettera quanto imparato dalla bravissima Monica Marianini in uno dei suoi fantastici corsi...QUI il link ad un video dove spiega questa tecnica...
Per il cuore e la faccina ho usato prima HEAVY BLACK GESSO di Finnabair e poi OPAL MAGIC PAINT  BLUE/GOLD...

I adapted Andy Skinner's 'Rust Technique' to the DECOART products I have in my stash, and used on the gears die cuts (I have used Tim Holtz GADGET GEARS #2 die), on the corners and around the heart. I tried to give an overall look of worn leather, while for the 'metal inserts' I followed what the very talented Monica Marianini taught me in one of her wonderful classes...HERE YOU WILL FIND THE LINK to a video where she explaines the technique...
For the heart and the face I have first used Finnabair's HEAVY BLACK GESSO and then OPAL MAGIC PAINT  BLUE/GOLD...

Presento questo progetto per la seguente sfida / I submit the projet to the following challenge :

SANDEE & AMELIE'S STEAMPUNK CHALLENGES BLOG: MAY 2017 CHALLENGE - 
ANYTHING GOES - STEAMPUNK/INDUSTRIAL

E' tutto per oggi, vi auguro un buon week-end...alla prossima!

That's all for today...Have a great week-end...see you next time!


Kisses&Hugs!
Simo.

EDIT:

Sono felicissima di essere stata scelta per i 'TOP 5 ' del mese di Maggio per la sfida di SanDee&Amelie's Steampunk Challenge Blog con questo progetto!!!

So glad I made the 'TOP 5 ' for the month of May, over at SanDee&Amelie's Steampunk Challenge Blog with this project!

Grazie!
Thank you!


mercoledì 10 maggio 2017

Art & Art: SIMONA...Shabby Vintage!


Art & Art : SIMONA...Shabby Vintage!: Ciao a tutti! Eccoci già a Maggio, con una nuova pagina di Art Journal...Come sapete il nuovo tema è lo stile ' Shabby '...


Ecco il mio nuovo tutorial sul Blog Art&Art!
Spero che vi piaccia ed ispiri a creare la vostra pagina dal sapore Shabby, o magari una card per la festa della Mamma!

Alla prossima!

Hi everyone...my new tutorial for Art&Art DT is online! I made a Shabby page for my Art Journal...hope you can follow the tutorial, as usual there's plenty of pictures!
See you next time!

Kisses&Hugs!
Simo.

martedì 9 maggio 2017

Mirror, mirror...


Ciao a tutti e benvenuti...oggi voglio presentarvi il mio nuovo progetto! Era da tanto tempo che avevo questa idea in testa e, complice il nuovo tema settimanale di SIMON SAYS STAMP MONDAY CHALLENGE - IT'S A FRAME UP  mi ci sono buttata e questo è il risultato...

Hello everyone and welcome...today I want to show you my brand new project! I had this idea in mind for a long time and I thought that  this week's  theme at SIMON SAYS STAMP MONDAY CHALLENGE - IT'S A FRAME UP  was just perfect...so I jumped on it and this is the result...


So che per molti può sembrare un tantino...'inquietante'  ma io l'adoro e la cosa che mi da più soddisfazione è che per una volta sono riuscita a creare ESATTAMENTE quello che avevo in testa...non succede spesso! Lol! Di solito ho una vaga idea quando inizio a giocare e poi il lavoro prende una sua direzione ed io seguo solo la corrente... ;-)

I know that to many of you this may look kinda... 'creepy', but I love it and I am so proud of it because for once it came out EXACTLY as I have imagined it...doesn't happen very often! Lol! Usually I have a vague idea of the outcome when I start to play and then the project just goes its own way and I just go with the flow... ;-)

Comunque, ecco i passi principali...

Anyway here's the tutorial...


Ho usato una placca in MDF, ho prima dato una mano di gesso bianco, poi con la spatola ho steso in maniera grossolana dela SNOW TEX, ho asciugato e con uno stencil  'a mattoni' ho steso la TEXTURE PASTE OPAQUE CRACKLE. Ho lasciato asciugare all'aria per permettere la formazione di tutte quelle belle crepe...nel frattempo mi sono messa a lavorare alla 'tappezzeria' prendendo un pezzo di cartoncino bordeaux che ho decorato con il LAYERING STENCIL 'DAMASK' ed il colore DAZZLING METALLICS 'SPLENDID GOLD'. Una volta asciutto, ho strappato una parte del cartoncino per far vedere il muro sottostante e l'ho incollato con il SOFT MATTE GEL, Ho fatto asciugare ed ho distressato i bordi con il DISTRESS INK BLACK SOOT. Per anticare il muro ho usato prima la ANTIQUING CREAM 'RAW UMBER' della DECOART MEDIA, stesa con le dita e poi tolto l'eccesso con un pezzo di carta e poi ho dato più risalto ai mattoni con il DISTRESS CRAYON 'WALNUT STAIN' . Dopodichè mi sono dedicata allo specchio...da un cartoncino spesso ho ritagliato la cornice utilizzando la fustella ORNATE FRAME #2 - TIM HOLTZ ALTERATIONS, l'ho prima colorata con HEAVY BLACK GESSO , poi l'ho dipinta con il DAZZLING METALLICS 'SPLENDID GOLD'. Qualche tocco di DISTRESS INK BLACK SOOT per accentuare l'invecchiamento e la cornice è pronta.
Ho preso una faccina ricavata da uno stampo e l'ho colorata con HEAVY BLACK GESSO , l'ho incollata ad un rettangolo di cartoncino con il 3D MATTE GEL e poi l'ho coperta con della garza, usando il SOFT MATTE GEL. Quando si è asciugato ho dipinto prima con HEAVY BLACK GESSO  e poi con l'acrilico DYLUSIONS BLACK MARBLE. Fatto asciugare e poi ho accentuato il tutto usando il colore acrilico OPAL MAGIC BLUE/GOLD...adoro questi colori, che cambiano a seconda se li si usa con una base bianca oppure nera...
Ho incollato lo specchio al 'muro' ed ho scritto la frase 'Mirror, mirror on the wall...' (che poi è il nostro Specchio, specchio delle mie brame, ecc...)

I have used a MDF plaque, painted first with White gesso, then with a spatula added some SNOW TEX, let it dry and using a stencil 'with bricks' added TEXTURE PASTE OPAQUE CRACKLE. Let it air dry to allow those nice cracks...meanwhile worked on the 'upholstery' using a piece of cardstock decorated with the LAYERING STENCIL 'DAMASK' and the DAZZLING METALLICS 'SPLENDID GOLD'. Once dry I teared a piece of cardstock to let see the 'wall behind', and glued down with SOFT MATTE GEL. Let that dry and aged the border using DISTRESS INK BLACK SOOT. For the wall I have spread first ANTIQUING CREAM 'RAW UMBER' by DECOART MEDIA, using my fingers and took off the excess with a paper towel, then enhanced the bricks with 
DISTRESS CRAYON 'WALNUT STAIN'. Now it's time for the Mirror...I die cut the frame from heavy cardstock using TIM HOLTZ ALTERATIONS ORNATE FRAME #2, painted first with HEAVY BLACK GESSO , then with DAZZLING METALLICS 'SPLENDID GOLD'. Addes few touches of DISTRESS INK BLACK SOOT to age it a bit more and it's done.
Made a little face using a mold, painted with HEAVY BLACK GESSO , glued to a piece of cardstock using 3D MATTE GEL and covered the all thing with gauze and the help of the SOFT MATTE GEL. Once dry I painted everything first with HEAVY BLACK GESSO and then with DYLUSIONS BLACK MARBLE acrylic paint. Afterwards added few touches of OPAL MAGIC BLUE/GOLD ACRYLIC PAINT...love these paints as they change depending if you use them on a white base or a black one...
Glued the Mirror on the wall and wrote the famous phrase...


E con questo è tutto...presento il progetto per la seguente sfida...

That's all for now...I submit this project to the following challenge...

SIMON SAYS STAMP MONDAY CHALLENGE - SIMON SAYS: IT'S A FRAME UP

Ci vediamo alla prossima...

See you next time...

Kisses&Hugs!
Simo.

mercoledì 3 maggio 2017

My own Galaxy...


Come diceva Buzz Lightyear...VERSO L'INFINITO...E OLTRE! Ciao a tutti...no non sono improvvisamente impazzita...oggi vi propongo una Tag 'Galattica' che ho fatto per le sfide di SIMON SAYS STAMP...Era da tempo che volevo cimentarmi nella creazione di una Galassia, dopo aver visto il tutorial di Marta Lapkowska (Maremi Small Art) su YouTube .
Ho preso come riferimento una foto di una galassia dal Web ed ho iniziato a dipingere usando un cartoncino per acquerello pesante (300g), precedentemente ritagliato a formare una tag. Ho usato i classici acquerelli in pastiglie per bambini ...e proprio come una bambina mi sono divertita a dipingere il mio 'Universo personale'. La parte più divertente è senz'altro spruzzare il colore bianco per ricreare le stelle!!! Per quello ho usato un pennello a ventaglio ed il colore acrilico Cool White della DecoArt Americana molto diluito.
Una volta asciutto ho ripassato i bordi con il Distress Ink Black Soot ed ho finalmente usato un paio di timbri che ho trovato nel 'Tim Holtz Alcohol Ink Kit', utilizzando l'inchiostro Hero Hues Black della Hero Arts.
Ho timbrato gli alberi vicino al bordo inferiore della Tag, poi con il colore acrilico Dylusions Black Marble ho colorato la parte rimanente, per dare l'illusione di una collina.
Ho incollato 3 cristallini (altre Galassie? chi può dirlo?), ho inserito una mini spilla da balia alla quale ho attaccato un charm in metallo - Word Sticks di Tim Holtz, ed infine la scritta allegata al kit...mi sembrava assolutamente appropriata...Ecco qualche foto in più...

Like Buzz Lightyear used to say...TO INFINITY...AND BEYOND!  Hi everyone...no...I didn't lose my mind...yet...today I want to show you a 'Galactic Tag' that I made for SIMON SAYS STAMP Challenges...I wanted to make my own Galaxy  since I watched Marta Lapkowska (Maremi Small Art) tutorial on YouTube .
I took a picture of a Galaxy from the Web  for reference, and started painting using a heavy weight watercolor cardstock, previously cut as a Tag. I have used ordinary watercolors for children...and just like a child I really enjoyed myself while painting my 'personal Universe'. The best part of it is definitely spattering the all thing with white paint to make the stars!!! To do so I have used a fan brush with Cool White acrylic paint by DecoArt Americana (very thinned down with water).
Once dry I enhanced the border with Distress Ink Black Soot and finally got to use a couple of stamps that came with Tim Holtz Alcohol Ink Kit. I used Hero Hues Black ink pad by Hero Arts.
I stamped the trees close to the lower border and then painted the rest of the tag with Dylusions Black Marble paint, to 'create' a hill.
Glued down 3 crystal stones (other Galaxies? Who knows?) used a mini pin with a Word Stick metal charm by Tim Holtz and, last but not least this sentiment included in the kit...I think it's quite perfect...Here below you can see  more pictures...


Presento questo progetto per le seguenti sfide / I submit this project to the following challenges:

- SIMON SAYS STAMP MONDAY CHALLENGE: THE GREAT OUTDOORS
  Is there anything greater than a Universe? Talking about 'Outdoors'!

- SIMON SAYS STAMP WEDNESDAY CHALLENGE: A HINT OF PINK
  Ok...technically it's purple-ish...what do you think?

Con questo è tutto...alla prossima!

That's all...see you next time!

Kisses&Hugs!
Simo.