giovedì 26 gennaio 2017

Don't be afraid...SPREAD YOUR WINGS AND FLY!


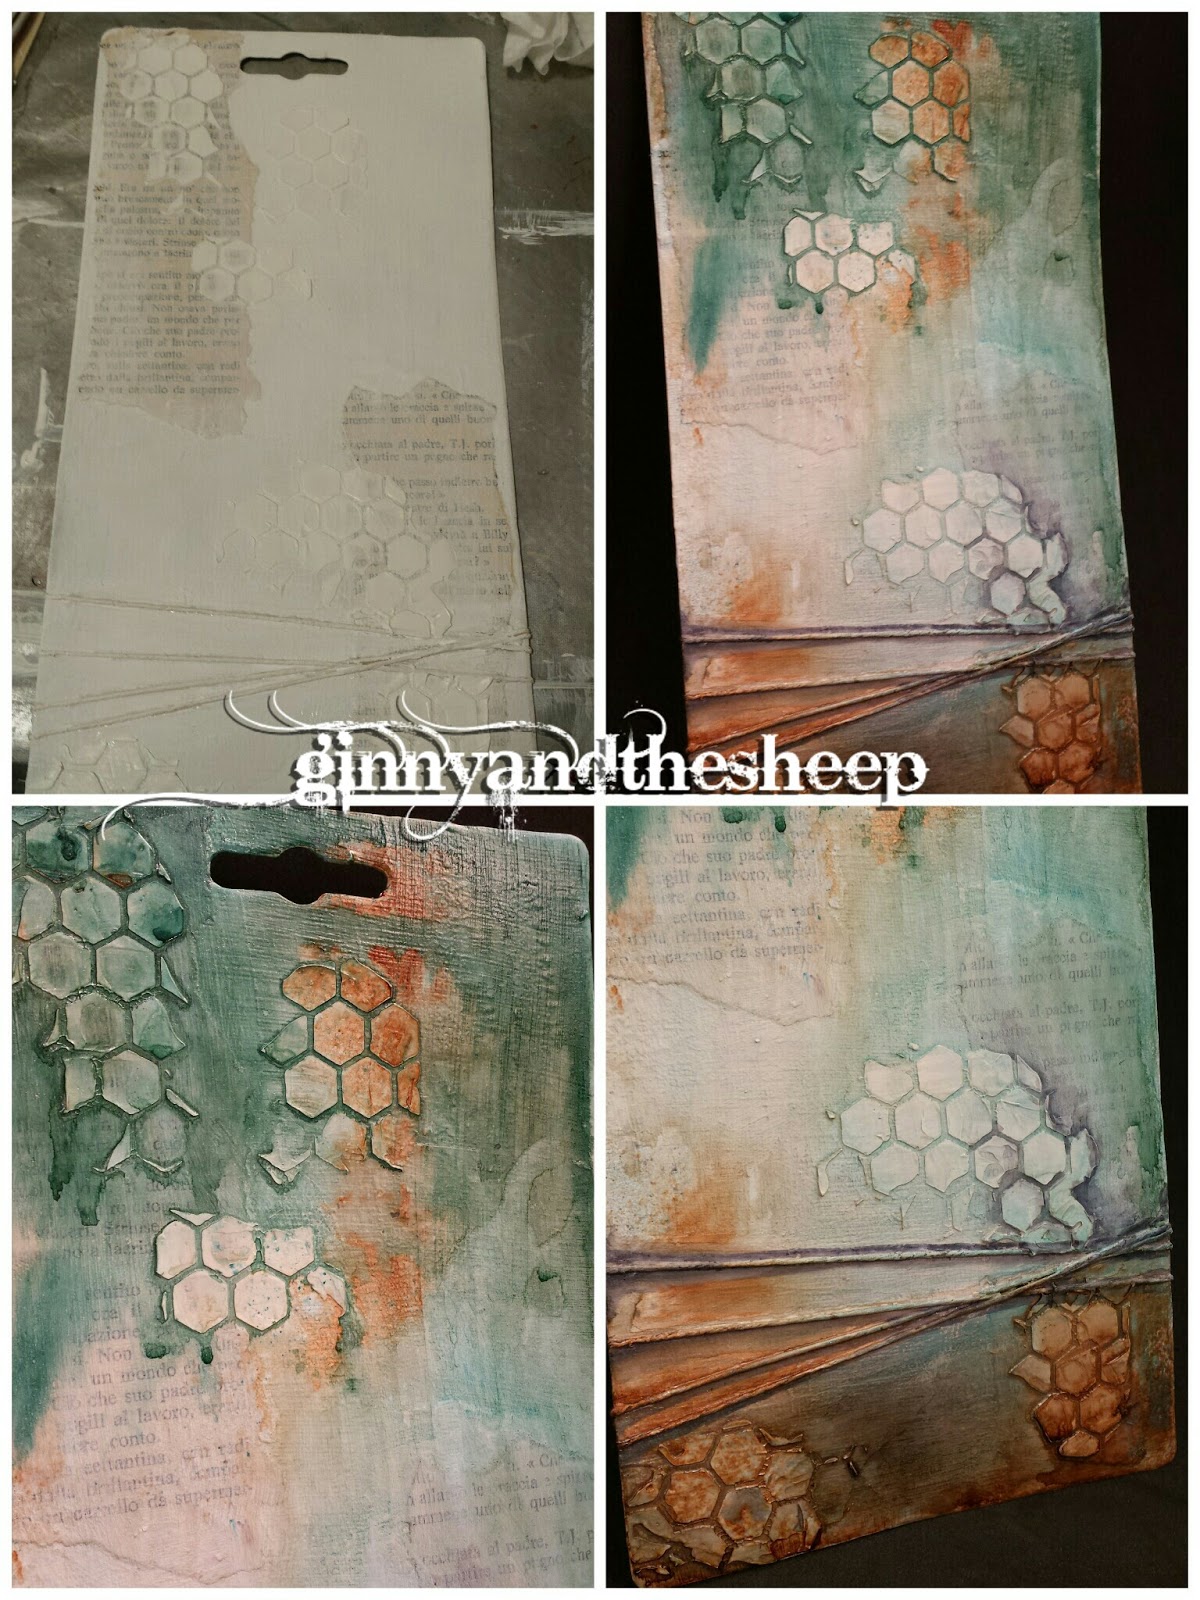
Ciao a tutti! Eccomi qui con un'altro tutorial. Si tratta di una 'tag' di recupero, si insomma il cartone di una confezione di biadesivo, lol! Ho coperto tutto con una buona dose di Gesso bianco, poi ho incollato dei pezzi di pagine di un vecchio libro, ho decorato con della Modeling Paste usando lo stencil 'Honeycomb' di Tim Holtz ed ho aggiunto del cordoncino, su cui ho passato del Gel Medium e del Gesso. Mi sono ispirata alla Moodboard di Gennaio nel Blog di  'Mixed Media Place', cioè ai colori teal, bianco, blu e marrone...
Ho quindi steso, prima con le dita, poi con una salviettina umidificata il colore Dylusions  'Calypso Teal' (bellissimo per altro) ho asciugato ed ho spruzzato in alto ed in basso, il Pearl Brown Mist della 13arts, ho diluito con un po' di acqua ed ho fatto 'correre' il colore. Asciugato e spruzzato solo in alto il Pearl Navy Blue sempre della 13arts, spruzzato acqua e fatto scendere il colore.
Nella parte in basso ho poi spruzzato il Moon Shadow  Mist 'Long John's Silver' di Lindy's Stamp Gang, una spruzzata anche di Starburst 'Screamin' Banshee Black' sempre di Lindy's Stamp Gang, che lascia dei riflessi blu metallizzati. Quest'ultimo però l'ho diluito, per non avere un colore troppo scuro.

Hello everyone! Here I am with another tutorial. It's a 'recycled' tag, from a packaging, lol! I have covered it up with White Gesso, then glued pages from an old book and added Modeling Paste using Tim Holtz Layering Stencil 'Honeycomb'. Added some twine, glued with Gel Medium and covered with Gesso once again. For the colours I've been inspired by January Moodboard in 'Mixed Media Place' Blog, that is teal, white, brown and blue.
So I painted the tag using Dylusions paint 'Calypso Teal', first with my fingers, then blended with a baby wipe. Dried  with a heat tool then used 13arts sprays: first Pearl Brown both on top and bottom, added a bit of water to make the colour run, dried and then sprayed with Pearl Navy Blue, only on top, same as before, added a bit of water to dilute the colour.
On the bottom part I have used Lindy's Stamp Gang sprays...first Moon Shadow Mist 'Long John's Silver', then Starburst 'Screamin Banshee Black', which leaves a wonderful blueish shimmer. Sprayed with water because didn't want a too dark colour.


Anche per il testo principale mi sono ispirata alla Moodboard di prima, il cui messaggio parla di non aver paura del domani, ma di vivere il presente. Per la scritta ho usato uno dei miei nuovi timbri di Visible Image, che si chiama proprio 'Live Life Now' , stampato con l'inchiostro 'Cup O' Joe - Mid-tone' della Hero Arts.

For the message, once again I got inspired by Mixed Media Place Moodboard, as you can see below. It's about not being afraid by our future, but live the present. Perfect moment to use my new stamp set by Visible Image, called 'Live Life Now', and my Hero Arts Mid-tone 'Cup O'Joe' ink pad.

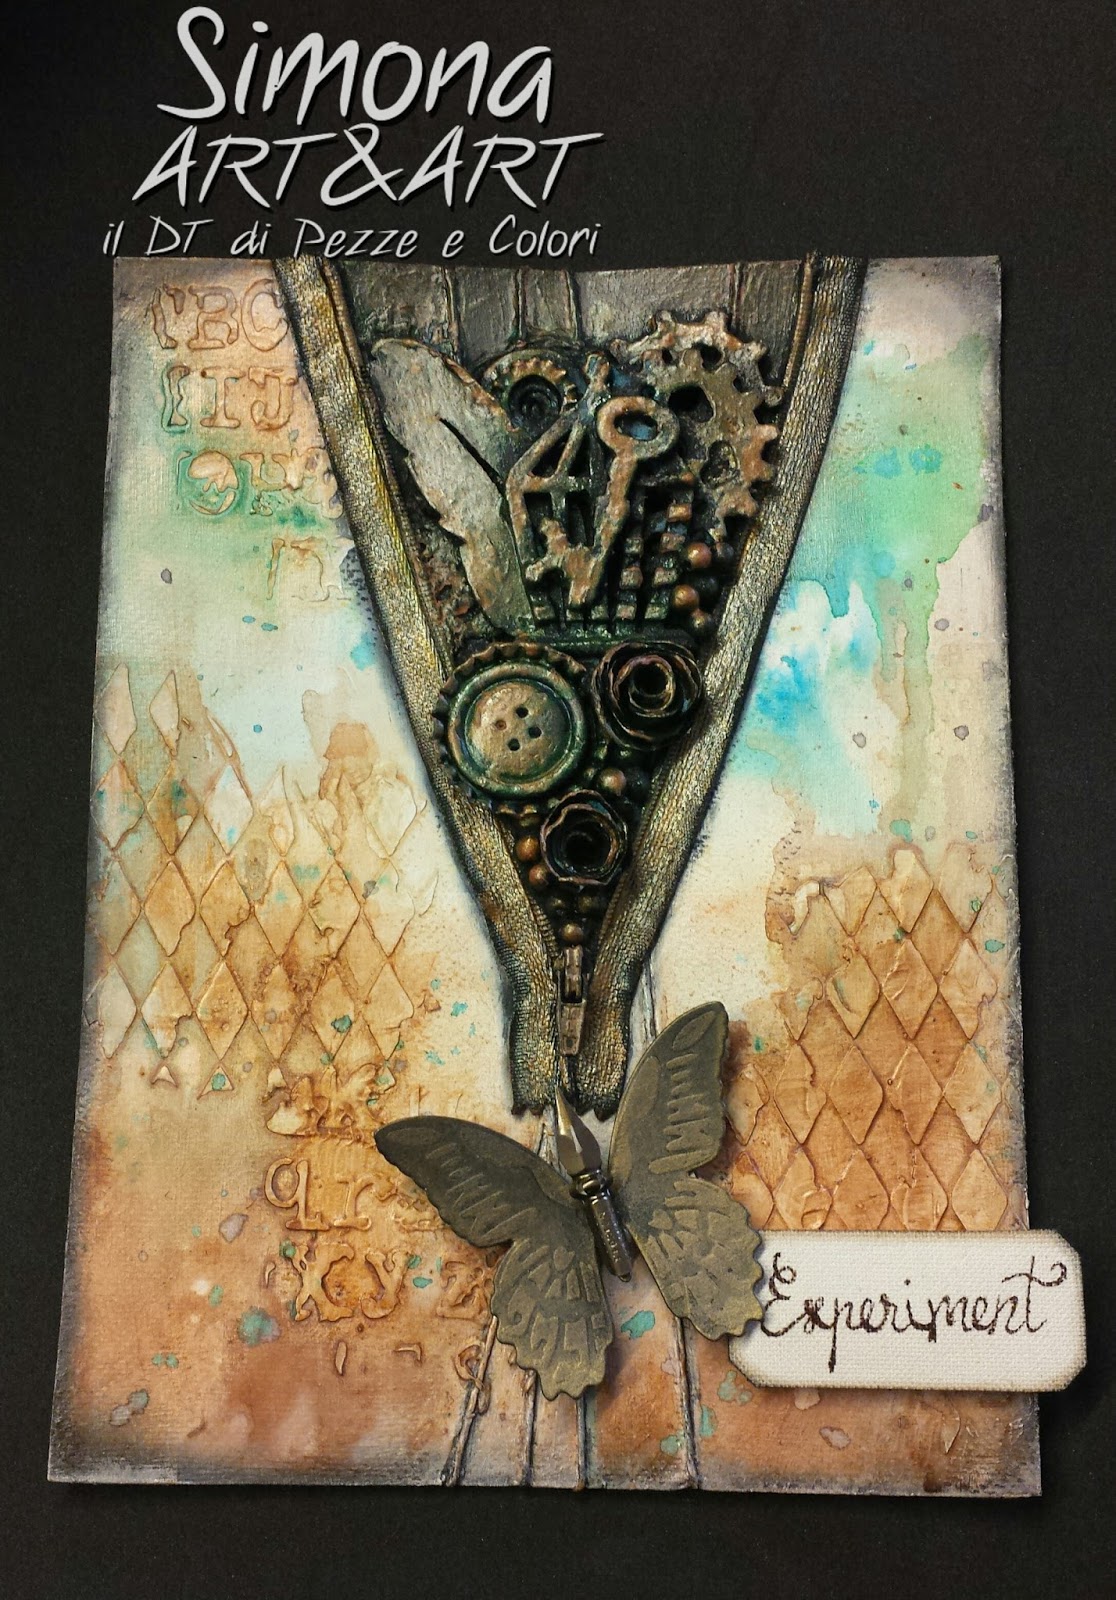
Per quanto riguarda il punto focale invece, mi sono fatta ispirare dal tema settimanale della sfida del Lunedì di Simon Says Stamp, cioè 'SPREAD YOUR WINGS', quindi ho utilizzato un timbro con una piuma ed un timbro con delle ali, che ho colorato utilizzando i Tombow Dual Brush pens ed i Distress Markers, delle fustellate di una gabbia ed una piuma, che ho 'invecchiato ed arrugginito', ed un cuore che ho dipinto in bianco. Poi delle tags, del cartone e del cordoncino, per creare spessore.

As per the focal point, I got inspired by the new Monday Challenge theme, over at Simon Says Stamp blog, that is 'SPREAD YOUR WINGS', so I have used stamps of feathers and wings, which I have coloured with Tombow Dual Brush Pens and Distress Markers, die cuts of a bird-cage (Tim Holtz mini Movers & Shapers) and a feather, 'aged and rusty'. Last but not least a tiny Heart, painted in white.  Then added tags, cardboard and twine.


Bene, siamo alla fine...spero vi sia piaciuto questo breve tutorial! Ci vediamo alla prossima!
Well then, this is it...I hope you enjoyed this mini-tutorial! See you next time!

Presento questo progetto per le seguenti sfide/ I'm submitting this project for the following challenges:

 Mixed Media Place Blogspot January Challenge

- Mixed Media Place Blogspot - January Challenge

- Simon Says Stamp Monday Challenge - Spread Your Wings

- Simon Says Stamp Wednesday Challenge - Anything Goes

EDIT:
Sono molto fiera del fatto che questo progetto sia stato scelto, tra altri, per il 'Designers Spotlight' nel Blog delle sfide del Lunedì di SIMON SAYS STAMP !!!

I'm very proud that this project has been featured in the 'Designers Spotlight' over SIMON SAYS STAMP MONDAY CHALLENGE BLOG !!!


Art & Art: SIMONA: LA "MIA" PAROLA PER IL 2017


Ciao a tutti...breve post per ricordarvi il mio tutorial sul Blog Art&Art (link qui sotto)...Una pagina di Art Journal per 'spiegare' la mia parola del 2017....SPERIMENTAZIONE!


Hello everyone...just a few words to introduce my tutorial on Art&Art Blog (link down below)...An Art Journal page to 'explain' my word for 2017...EXPERIMENT! (The tutorial is in Italian, but plenty of pictures...) EDIT: If there is anything you wish to ask please leave me a comment and I will answer asap!

Art & Art: SIMONA: LA "MIA" PAROLA PER IL 2017: “ALL LIFE IS AN EXPERIMENT. THE MORE EXPERIMENTS YOU MAKE, THE BETTER” - R.W. Emerson - ...

mercoledì 18 gennaio 2017

Just Chilling...Simon Says Stamp Monday Challenge!


Ciao a tutti! Eccomi di nuovo alle prese con una nuova sfida del Lunedì sul Blog di SIMON SAYS STAMP...il tema della settimana è 'CHILL OUT', che può significare 'Rilassarsi' oppure 'congelarsi'...ora, in questi giorni soffro tanto il freddo che francamente preferisco pensare a lidi più caldi, così ho ripreso in mano il mio Art Journal e mi sono dedicata ad una paginetta per 'Rilassarmi' pensando ad una bella spiaggia greca!

Hi everyone! Here I am with another Monday Challenge, over at SIMON SAYS STAMP Blog. This week's theme is 'CHILL OUT'...since at the moment I really can't stand the cold, I decided to 'Chill out' creating a page in my Art Journal...and thinking about a warm and sunny greek beach!


Ho creato la mia texture con uno stencil 'handmade' e della Modeling Paste. Poi Gesso bianco, sprays e Gelatos. Qualche timbrata qua e là e poi sono passata agli abbellimenti. Sulle tags dietro alla foto ho usato i colori Dylusions (Black Marble e Calypso Teal) e per la prima volta ho usato i Distress Stains metallici (Tarnished Brass sulla tag nera e Brushed Pewter su quella turchese - non so se si vede nella foto, ma l'effetto 'anticato' mi piace molto!)
Forse mi sono fatta prendere la mano dalle bolle!!! Lol! Nah...mi piacciono troppo!

I have created some texture using a 'handmade' stencil with Modeling Paste. Then White Gesso, sprays and Gelatos. Few stamps here and there and then glued down the embellishments. On the tags behind the photo I have used Dylusion paints (Black Marble and Calypso Teal) and for the first time my brand new Metallic Distress Stains (Tarnished Brass on the black tag and Brushed Pewter on the Teal one - I don't know if you can properly see in the photo but I really love this 'antique' effect!)
On second thoughts...I just got carried away by the bubbles!!! Lol! Nah...I love them too much!


Ci vediamo alla prossima!
See you next time!

Kisses&Hugs!
Simo.

venerdì 13 gennaio 2017

Fun with Lindy's Stamp Gang goodies!


Ciao a tutti! Qualche giorno fa ho acquistato i 'Little Lindy', cioè dei 'try-me' kits della linea di prodotti Lindy's Stamp Gang...ho sempre sentito parlare  di questi sprays e dei Magicals e finalmente eccoli nelle mie mani! Ecco quindi un mini video che ho creato, mentre ci giocavo un po'...ehm...le mie qualità di regista/editor sono molto scarse...abbiate pazienza! Enjoy!

Hello everyone! Few days ago I purchased a couple of 'Little Lindy', a 'try-me' kit by Lindy's Stamp Gang...always heard about the sprays and Magicals and  finally they are here in my hands! So I made a little video while I was having some fun with them..ehm...my director/editor skills are almost non-existant so...please bear with me! Enjoy!


Ho usato i seguenti prodotti / I have used the following products:

- Ayeeda White Gesso by 13arts
- Modeling Paste by Stamperia
- Lindy's Stamp Gang (nell'ordine in cui li ho usati / the order in which I used them)
  - Moon Shadow Mist - Phantom Fuchsia (Hottie Patottie try-me kit)
  - Starburst Spray Hottie Patottie Hot Pink (Hottie Patottie try-me kit)
  - Moon Shadow Mist - Long John's Silver (Black try-me kit)
  - Starburst Spray - Screamin' Banshee Black (Black try-me kit)
  - Starburst with dauber (con applicatore) - Gregarious Grey (Hottie Patottie try-me kit)
  - Magical - Hottie Patottie Hot Pink (Hottie Patottie try-me kit)
- Ayeeda Clear Gesso by 13arts
- Hero Arts - Hero Hues Black Ink pad
- Kaisercraft Stamp 'Diamonds'
- Tim Holtz Distress mini ink pads by Ranger:
  - Ground Espresso
  - Black Soot

Momento OOPS!...dopo aver asciugato i vari sprays ho cercato di aggiungere anche un po' di Starburst con l'applicatore...ma ho tolto un po' del colore di fondo...l'effetto finale però non mi dispiace...'Happy Accident!'
Devo dire che che mi sono divertita tanto ad usare questi colori...l'effetto 'brillantinato' che lasciano è davvero bello! Secondo il mio gusto preferisco i toni scuri, quindi i Moon Shadow sono perfetti, con una base marrone, ma anche i neri sono bellissimi...lo Starburst nero (Screamin' Banshee Black) lascia dei riflessi blu fantastici...e poi, dai...hanno dei nomi strepitosi!!! Lol!

OOPS! moment...after drying with my heat-tool the layers of sprays, I tried to add the Starbust with the dauber, but lifted some of the background color...I like it how it end up though, so...'Happy Accident!'
I have to say that I had so much fun using this colors...the shiny/shimmering effect is so awesome! According to my personal taste I prefer the darker tones, so Moon Shadow Mists are perfect, as they have a brown base color, but the Blacks are great too...the Starbust Screamin' Banshee Black has some blueish reflections that are brilliant...and c'mon...their names are amazing!!! Lol!


Ok, con questo è tutto...alla prossima...magari con un altro video, La pratica rende perfetti, no?

So...this is it...until next time, maybe with another video. Practice leads to perfection, right?

Kisses&Hugs!
Simo.


giovedì 5 gennaio 2017

Let's START Something NEW!


Ciao a tutti! Si ricomincia con le belle abitudini, cioè le sfide di SIMON SAYS STAMP!
Le sfide (sia del Lunedì che del Mercoledì) richiedevano di usare qualcosa di nuovo, mai utilizzato prima, quindi mi sembrava l'occasione perfetta per usare i miei nuovi colori Dylusions ed un timbro e una fustella della Torre Eiffel che non ho mai testato. Ho usato anche uno stencil della 'Carabelle Studio' - Le temps passe vite  - (il tempo passa in fretta...parole sacrosante!) visto che sono i prodotti 'dimostrati' questa settimana nel blog del Lunedì!

Hello everyone! Let's start again with good habits, i.e. SIMON SAYS STAMP Challenges!
This week both challenges (Monday & Wednesday) required to start something new, such as products never used, a brand new thing from our stash, so this seemed to me the perfect occasion to use my brand new (meaning still wrapped in plastic) Dylusions paints and a stamp and a die of the Eiffel Tower which I have never used before. I also used my 'Carabelle Studio' stencil - Le temps passe vite - (Time flies...hear, hear!) as these are the showcased products on the Monday challenge this week!


Ho iniziato stendendo Gesso nero di Finnabair by Prima, poi della pasta modellabile con la spatola, in modo molto casuale, per creare un po' di texture. Una volta asciutto ho steso con le dita prima il colore 'Black Marble' e poi il 'Calypso Teal' della Dylusions...Non avevo mai usato questi colori e devo dire che mi hanno molto soddisfatta! Sono piuttosto liquidi, diversi dai colori acrilici che uso normalmente (DecoArt Americana), si stendono facilmente e si mescolano bene, sia con le dita che con una salviettina, e non ne serve tantissimo...mi spiace averne presi solo 3 (ho anche il bianco)...altre voci da aggiungere alla mia 'wish-list'! Lol!
Poi ho aggiunto qua e là un pò di 'Raw Sienna' ed infine ho utilizzato lo stencil e la Decorating Paste della Decoart.

I started with Finnabair Heavy Black Gesso by Prima, then added modeling paste with a palette knife, in a very random way to create some texture. Once dry I added Dylusions paints with my fingers, first 'Black Marble' then 'Calypso Teal'...It was the very first time with these paints, and I love them! They are rather fluids, pretty different from the acrylics that I normally use (DecoArt Americana).  They spread and blend very well, both using fingers or a baby wipe, and you don't need a lot of paint...I just regret I have bought only 3 (also have the white one)...another thing to be added to my wish list! Lol!
After that added Raw Sienna here and there and used the stencil with DecoArt Decorating Paste.


Sulla tag ho stampato l'immagine usando il timbro 'mid-tone Cup o'Joe' della Hero Arts, poi sempre con lo stencil della Carabelle Studio ho usato prima il Distress Ink pad Hickory Smoke, poi slittando leggermente lo stencil il Distress ink Vintage Photo. Ho poi 'invecchiato' la tag usando i Distress inks: Vintage Photo, Walnut Stain, Ground Espresso e Black Soot.
Ho ricoperto del cartoncino con del nastro adesivo in alluminio e fustellato degli ingranaggi e la Torre Eiffel (questa l'ho fustellata 2 volte, una anche con il cartoncino semplice), poi per dare al 'metallo' un aspetto un po' vissuto, ho usato i Distress Crayons Black Soot e Walnut Stain. 

I stamped on the tag the image using Hero Arts mid-tone 'Cup O'Joe' ink pad, then, always with the same stencil I used first Distress Ink pad Hickory Smoke, then shifting the stencil a bit went overe that with Vintage Photo. Distressed the tag using Vintage Photo, Walnut Stain, Ground Espresso and Black Soot.
I covered some cardstock with aluminium tape and die cut some gears and the Eiffel Tower (I die cut another one only with plain black cardstock). To give the 'metal' an aged look I have used Distress Crayons - Black Soot and Walnut Stain.


Il mini tutorial è finito!...Presento questo progetto per le seguenti sfide:
This mini-tutorial is finished!...I submit this project to the following challenges:


Ci vediamo presto!
See you soon!

Kisses&Hugs!
Simo.

lunedì 2 gennaio 2017

Happy New Year...with a Challenge!

Ciao a tutti e Buon Anno! Cosa c'è di meglio, per riprendersi dalle varie feste, che partecipare ad una sfida, magari Steampunk? Nel Blog di SanDee&amelie's Steampunk Challenges la sfida del mese è "My 3 Personal 2016 Favourites - Steampunk/Industrial" (cioè i miei 3 progetti Steampunk/Industrial preferiti del 2016)...ed eccoli qua...

Hello everyone and Happy New Year! Is there anything better, to get a break from all these feasts and holidays than taking part to a challenge, maybe a Steampunk one? Over at SanDee&amelie's Steampunk Challenges Blog the brand new challenge for this brand new month is "My 3 Personal 2016 Favourites - Steampunk/Industrial"...so here they come...

Ho deciso di proposito di non postare le foto dei lavori che ho già presentato per le due sfide di Novembre e Dicembre, per avere l'opportunità di mostrare alcuni dei miei 'all time favourites'!

I have decided on purpose not to post pictures of the projects that I have submitted for the last challenges, just to be able to show some of my 'all time favourites'!


Cliccate sulla foto per andare al POST - Click of the photo to read the POST

Cominciamo con la Tag di Gennaio delle 12 Tags of 2016 - Technique Remix di Tim Holtz...che ho fatto in aprile, in realtà! Lol! Infatti ho iniziato a seguire questa 'tradizione' a marzo, così poi mi sono messa in pari con le tags che  mi mancavano...Per questo progetto ho potuto dare sfogo alla mia passione per ingranaggi e metallo, utilizzando anche il mio primo timbro di Tim Holtz...e cercando di ovviare alla mancanza delle varie cose usate da Tim, con quello che avevo a disposizione. Devo dire che questa cosa mi ha aiutata molto ad osare ed usare la fantasia per ottenere un risultato il più simile possibile all'originale...e ne sono ancora molto fiera...

Let's start with the January Tag, as part of the '12 Tags of 2016 - Technique Remix' by Tim Holtz..which actually I have made in April...Lol! As a matter of fact I have started following this 'monthly tradition' in march, so I tried to keep up and make also the tags that I missed...With this project I really dived into my passion for cogs, gears and metal, using my very first Tim Holtz stamp,,,and trying to think outside the box, in order to achieve the same results even without the materials used by Tim, just using mostly the things I had in my stash. I must say that this really helped me to dare and be creative...and I'm still really proud of the results...

Cliccate sulla foto per leggere il POST - Click on the photo to read the POST
Il secondo progetto riguarda una sfida di Simon Says Stamp...'Show me your metal'!
Avevo già presentato un'altro progetto, ma l'idea di creare qualcosa di Steampunk mi aveva talmente entusiasmato che non riuscivo a fermarmi!!! Sono molto contenta di questo pezzo per tanti motivi...è la prima 'Shadow Box' che ho fatto...piena di imperfezioni, ma ne sono comunque fiera. E poi il gufetto...così carino...!Lol!

I made the second project  for a challenge over at Simon Says Stamp Blog...the theme was 'Show me your metal'! I had already submitted a project but the idea of creating something Steampunk was so exciting...I couldn't just stop!!! I'm very happy of this one for lots of reasons...it is the very first 'Shadow Box' I have made...totally imperfect...but I'm proud of it nonetheless, And the owl...it's so cute...!Lol!

Cliccate sulla foto per leggere il POST - Click on the photo to read the POST
L'ultimo progetto è una pagina del mio Art Journal, anche questa fatta per una sfida di Simon Says Stamp, 'At the Movies'  Con questa pagina mi sono divertita tanto con effetto ruggine, ingranaggi, stencil e pasta modellabile...sarebbe perfetta anche come card maschile, no?

The last project is a page of my Art Journal, made for another challenge over Simon Says Stamp, 'At the Movies'. With this page I had so much fun with rust effect, cogs, stencils and modeling paste...wouldn't it be perfect as a male card?

E questo è tutto, spero che questo 2017 sia un anno di serenità, amore e creatività per tutti...a presto!

That's it, I hope that this 2017 will be a year full of peace, love and creativity for everyone...see you soon!

Kisses&Hugs!
Simo.